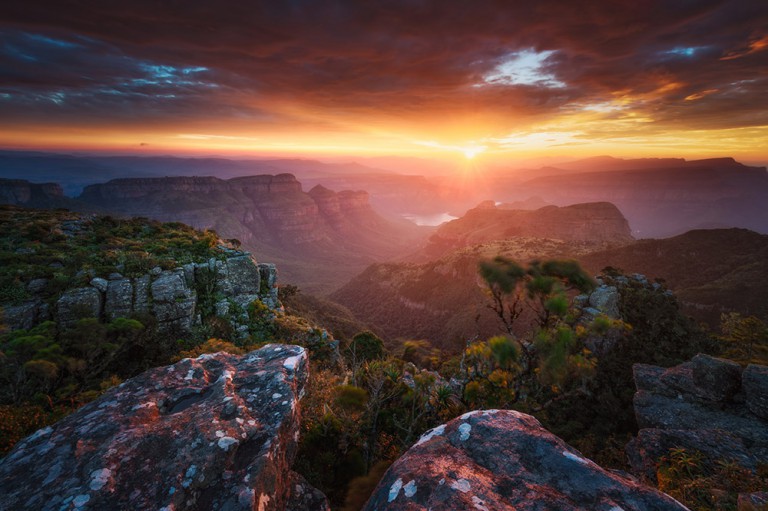
These days, HDR images are found everywhere – especially when it comes to landscape photography. We look at a few different ways to create beautiful HDR, and HDR-like, images yourself.
What is HDR?
First off, a brief explanation about dynamic range.
All images have a dynamic range: the variation or range of tones from the lightest to the darkest. However, with a single exposure, cameras cannot capture the full range of tones we can see with the naked eye. Some cameras cope better than others, but on the whole they struggle to reproduce the very darkest and very lightest tones together. Think of a sunset. If you expose for the sunset, the sky will come out looking beautiful and golden, but the foreground will be a dark silhouette. If you expose for the landscape, the sunset becomes over-exposed and washed-out. You get either dark tones or light tones, but not both, unless you manipulate your images in post production. One way to manipulate is with HDR photography. HDR means high-dynamic range. It’s the creation of an image with a wider range of tones than normally possible.
There are a few different ways of achieving this effect.
Creating HDR-lookalikes using one image file
1. Grading RAW files
Shooting in RAW mode opens up a lot more possibilities when it comes to editing. Using Photoshop or Lightroom, you can reduce the hi-lights in your skies or add fill light to the shadows (a gradient filter works well – see below), to create an HDR effect on a single image. The result will be something that looks similar to an HDR, but without as much dynamic range. Depending on your original exposure and the quality of your camera this might be enough to achieve the desired effect. It is important to shoot in RAW when attempting this method because although the original image may appear too dark or too light, there is often still a lot of available data to be manipulated – data that is generally lost when shooting in JPG.

Here we see a single exposure edited in Lightroom. A graduated filter was applied to the lower half of the image to add light to the underexposed landscape while retaining the original exposure on the sky.
2. Using filters
Learning how to use ND (neutral density) filters properly will allow you to capture more tonal range in-camera, as you’re taking your photo. Placing a half-graduated ND filter on your lens, over the top (sky) half of your image, will reduce the amount of light coming in from that area and allow you to get a more balanced exposure across your landscape and sky. Start your filter collection with the LEE digital SLR starter kit (from R5685) and an adapter ring (from R515), available in South Africa from Camquip.
Here’s now ND filters can affect an image:
Creating traditional HDRs
Traditional, (you could say genuine), HDR images involve taking multiple exposures of the same scene and combining them in post production to create a single image that uses the optimal exposure of each.
Using a tripod to ensure an identical frame, take three images at 2-stop exposure differences. Make sure you have one image that shows all the details in your hi-lights, one that shows your mid-tones correctly and one that shows all the details in your shadows. Shoot in manual or aperture priority mode and keep your depth of field (f-stop) the same for each exposure. For very contrasting scenes, take up to 9 images at 1-stop exposure differences covering the full range of tones in your scene.
Then, use the following methods to combine them in post production.
1. Using Photomatix Pro
Photomatix Pro is by far the easiest and most widely used automated HDR software. Load your images into Photomatix and follow the steps to the ‘Adjust and Preview’ screen, where you can choose and tweak a variety of filters. Using the ‘Exposure Fusion’ option will render more realistic-looking HDRs. It retails for $99, and there’s a free trail version so you can see how it works.
April reader discount: Buy the April 2016 issue of Getaway magazine and you’ll find a 40% discount on Photomatix Pro – that’s 17x your money back on the cost of the magazine this month! Offer valid until 31 May 2016.
2. Using layers in Photoshop
Layer your images in Photoshop, stacked on top of each other from lightest to darkest (or vice-versa). Add layer masks to each image and paint over them using your brush tool. Using black on a layer mask reveals the image on the layer beneath, while using white will hide the image beneath. Paint each layer, hiding and revealing parts of your scene until you are happy with the result. Flatten your image (Mac: cmd+shift+E, PC: ctrl+shift+E) and save.
3. Using luminosity masks in Photoshop
This is how the pros do it, and it is quite time-consuming. It gives you an incredible degree of control however, and renders the best-looking HDRs.
Read how to master this technique on Hougaard Malan’s tutorial ‘Why Luminosity Masks are Awesome‘. Be sure to read the tutorial from parts one to three so that you understand the process in full.

A manual HDR created by Mark Dumbleton using Luminosity Masks.
Mark Dumbleton has a great video tutorial for $39 on ‘Landscape Photograph Development’, where he also explains how to use luminosity masks.
This is what’s possible:
Read more about HDR photography in the April 2016 issue of Getaway magazine.
Get this issue →
Don’t miss out on the Photomatix Pro discount code you’ll find there, available until 31 May 2016.
You may also like
Related Posts
Street photography is as much about recording moments in time as it is about telling...
read more
Using a drone not only changes your perspective but the way you shoot too....
read more
Catching a bird doing anything but perching on a branch might be the hardest photographs...
read more