Let your creativity take flight. Andreas Eiselen tells you how to take photos with a drone, using this image by photographer Eddie Osthuizen.
Eddie says…
Paternoster on the West Coast has an endless beach with seemingly perfect waves. But the notorious wind makes drone flying a challenge. To limit the amount of time spent in the air over the waves and at the mercy of unpredictable winds, I did as much configuration as possible before takeoff. Using a combination of auto-exposure bracketing (AEB), raw capture files and flat colour profiles, I could do more in post-production and less in flight, which limited the risk and provided me with more options.
Take it yourself
Using a drone not only changes your perspective but the way you shoot too
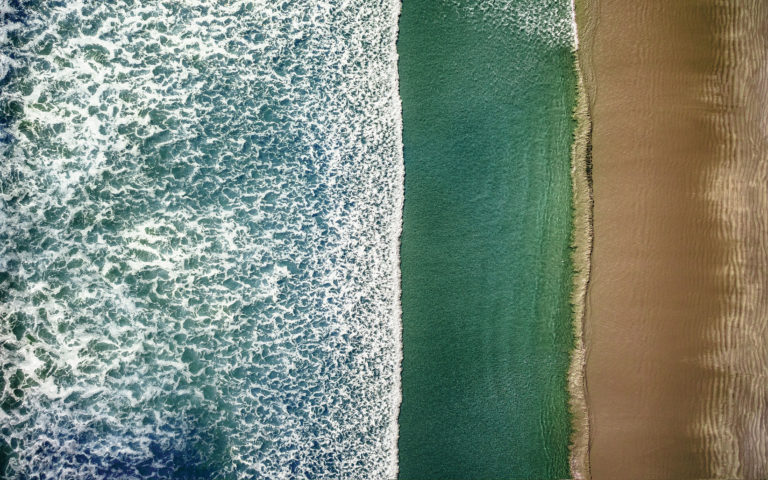
Equipment DJI Phantom 3 Advanced drone (88 metres high at 215 metres away), ISO 100, f/2.8, 1/480 sec Forbearance. Image credit: Eddie Osthuizen
Equipment
Drone Use any drone with a decent onboard camera. Make sure you have a fast micro SD in both your phone and drone. Use SD cards with Class 10/UHS-1 and above, and a writing speed of 60 Mbps. Slower cards will cause disconnections in flight and problems with video feed as they can’t process data quickly enough. If you’re new to drone flying, find an open field and practise until the controls become second nature.
Also read: Gear: choosing a drone
Settings
Shoot in raw (or large, low-compressed jpegs if your camera does not allow raw) and D-Log, which supplies a very flat, low-contrast image that allows you to keep detail in post-production.
Take wind into account when setting shutter speed and don’t go below 1 sec; moving subjects like waves or animals will need a high speed.
Set ISO as low as possible as most drones don’t handle higher sensitivity well. Start with the aperture at f/5.6 and move up and down for correct exposure. Depth of field shouldn’t be too much of a concern because of the distance between the camera and subject, but f/8 will give you the sharpest image.
Practical
Safety first. Knowing the rules and planning your flight is essential – check that the airspace you plan to fly in has no restrictions.
Shoot during the ‘golden hour’ after sunrise or before sunset. This gives you lower contrast, longer shadows and better texture and depth.
Correct framing is key – directly from above for a bird’s-eye-view shot. Flying a drone can be stressful but take your time with this.
Use bracketing to get the exposure right. Most drones have an AEB (auto-exposure bracketing) function that allows you to shoot a set of different exposures that can be blended in post-production.
Tips
Starter tip Use the aerial perspective – look straight down to find patterns and shapes.
Amateur tip Most drones are used for filming so you can set the aspect ratio to 4:3 (photography) or 16:9 (video), which gives a narrower, panoramic feel. Try both and see which works best.
Pro tip Use ND filters to slow down shutter speed and create images with longer exposures. This is great for capturing motion blur and the light streaks of moving subjects such as cars.
You may also like
Related Posts
Street photography is as much about recording moments in time as it is about telling...
read more
Catching a bird doing anything but perching on a branch might be the hardest photographs...
read more
Capture the sparkling night sky by using your camera’s high-sensitivity capabilities. Go on a moonless...
read more