This simple compositional tool is the easiest way to draw the viewer’s eye around your photograph and towards your focal point. Teagan Cunniffe explains how, using this image of Deadvlei by Shem Compion.
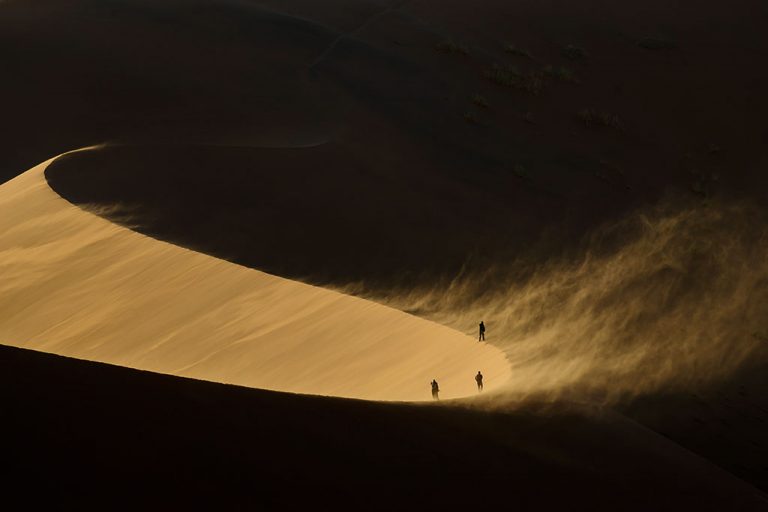
Equipment Settings: Nikon D800E, Nikkor 200-400mm f/4, ISO 400, f/8,
1/1 000 sec Image credit: Shem Compion
Shem says…
Most photographers take along only their wide-angle lenses for photographing this famous landscape. The wind was blowing strongly from the east, so I told my clients to bring their 400mm lenses with them. It’s a big ask, to lug these heavy lenses a long way through the desert sand to get to Deadvlei.
But as the sun hit the dunes and the wind blew the sand up into the air, we all said our collective thank-yous for the extra length of our lenses. shemimages.com
Take it yourself
Leading lines can be vertical, horizontal, diagonal or curved. Any camera can be used – it’s all about finding and arranging these lines so that they lead towards your subject
Equipment
DSLR Use a wide-angle lens (16–35mm) to capture leading lines that are in your immediate vicinity. Use a telephoto lens (70–400mm) to isolate leading lines that are further away from you.
Settings
Keep the entire scene, and thus the entire line, in focus by using Aperture Priority or Manual mode and setting a narrow aperture (f/10–f/16). Don’t stop down your aperture to as small as it can go. Adjust your shutter speed and ISO accordingly.
Practical
Start training your eye to look for linear elements wherever you go. Look for clear, graphic lines like roads, fences, pathways, ripples in the sand… The more you look, the more you will notice.
Question where the line leads to. Ideally, towards an interesting part of the scene or towards your subject. The power of your leading line is wasted if it doesn’t lead the viewer’s eye anywhere worth noting.
Isolate leading lines so that they are easily distinguishable from the rest of your scene and are not obstructed by another element.
Zoom in or physically move to exclude any elements that don’t work.
Also Read: Road Tripping in South Africa
Getaway’s top tips
Starter tip: Set your tripod just below thigh-height to accentuate leading lines close to your camera.
Amateur tip: Use lines for their best energy effect. Vertical lines add a feeling of strength to your image, horizontal lines ‘flatten’ and calm the scene, and diagonal lines add a feeling of energy and movement. Tight ‘S’ curves add tension, while slow, lazy ‘S’ curves have a feeling of tranquillity.
Pro tip: Combine leading lines with the Rule of Thirds. Place your main subject a third of the way into your frame and look for a leading line that directs to that point.
These tips first appeared in the March 2018 issue of Getaway magazine.
Get this issue →
Our March issue features three magical train journeys, how to plan your escape on a dhow safari around Bazaruto, where to eat delicious fare when you have only 36 hours in Mumbai, plus lots more.
You may also like
Related Posts
Street photography is as much about recording moments in time as it is about telling...
read more
Using a drone not only changes your perspective but the way you shoot too....
read more
Catching a bird doing anything but perching on a branch might be the hardest photographs...
read more